Showing posts with label Physics. Show all posts

Thursday, January 17, 2008

Exploring Electrostatics

Electrostatics in general is one of the coolest and most fundamental topics in Physics. Almost the entire US technology base, and even the national economy depend on industries built around a deep understanding, and innovative use of electrostatic principles.

Yet somehow, many high school and middle school electrostatics labs have been relegated to simple exercises like rubbing balloons through your hair and moving bits of tissues paper with charged combs. So here, I'd like to supercharge some of these ideas and introduce some opportunities for more science, measurement, and innovation around the topic.


Electrostatic Simulations
Let's start with just trying to "see" and understand what is going on in simple electrical situations with charges and fields and voltages, etc. Chalkboard drawings are just so antiquated. Instead, start by playing with these three online simulations by clicking on the links or pictures below.


A 2-dimensional Electrostatics Applet. This one lets you move charges around and plots fields, potential difference (Voltage), equipotential lines. etc. as things move around. The picture above shows the fields, potential, and charge for a quadrupole (two positive and two negative charges).


A 3D Electric Field visualization applet for 2D charge distributions. This picture shows the electric field strength (in the z axis) of a simple dipole (one positive and one negative charge)._


A 3-dimensional Electrostatic Field Applet that let's you look at the fields that result from interesting 3-D charge distributions and simple current configurations. The picture above shows a couple of simple wire loops with current running in opposite directions.

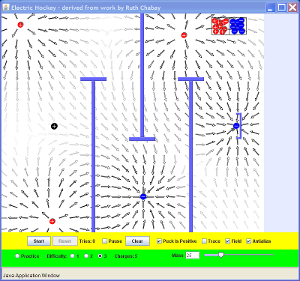
When you get the point that you think you understand what is going on and how to visualize it, try playing this game of Electric Field Hockey and see how you do! You have to place charges on the field to make the puck respond the field generated by your placed charges in order to navigate the boundaries into the goal! Click on the picture or link below to play.

Sim preview image

Electrostatics in the Real World
Now that you've fiddled with a few spiffy simulations on the computer to begin to get a feel for electrostatics, now how do we translate these ideas to the real world? If I was really old-school, I'd suggest starting by making a simple electroscope and electrophorus with some thin metal foil. Yawn.

(Speaking of old-school, though, this is one of my favorite Electrostatic demos, by Prof. Lewin at MIT demonstrating the magic of cat fur. I've seen it in person, where the flash effect is much more obvious than in the low frame rate video. It's the deadpan theater aspect that really does it for me.)


Okay, yes, cat fur and Styrofoam are really old-school, though evidently fun when properly wielded. But there are a couple of more modern variations like the PVC Pipe Static generator that work REALLY well,
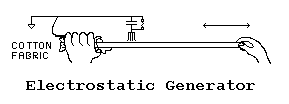
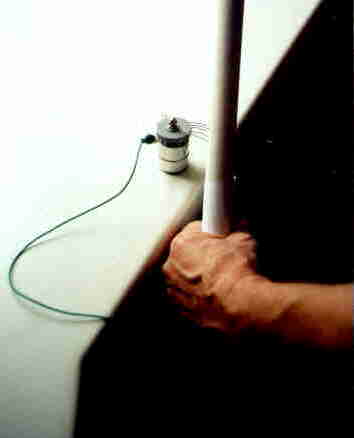


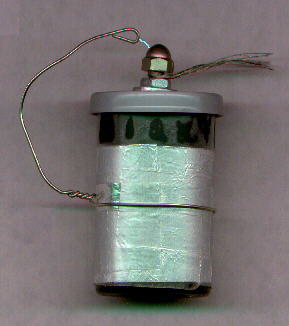
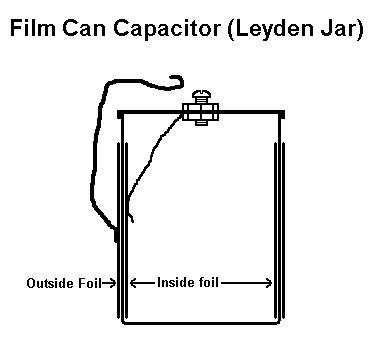
And a nice Leyden Jar type Capacitor made out of a film can that you can use to store charge.


If that stuff works for you, here is a GREAT web site with all sorts of static machinery that's easy for the aspiring scientist to build, called "Electric Blue Sparks." One of my favorites was entitled the "I have to make really big sparks at the science fair tomorrow" link.


Or how about making a real-life 3-D electric field viewer? (easier than it sounds-the whole thing is doable in about 5 minutes start-to-finish) Try this variation on the traditional magnetic field viewer (simply 1/16th inch slivers of 0000 (ultra-fine) steel wool suspended in baby oil. To see electric fields instead, just substitute 1/16th inch slivers of one of your classmate's black hair. Bonus points to any student who can explain how or why this works. See William Beaty's site for details including a video example.

Better yet, if you'd like to use some of this last century's technology, how about making a REALLY sensitive electronic electrometer? The circuit couldn't be simpler. (Also from William Beaty's Web site!)


Neither the earth-ground nor the 1 MOhm resistor are required. You can change the gain (sensitivity) of the detector by changing the value of the resistor, and either shortening or lengthening the antenna.

In contrast to the foil-variety electrometers, this sucker is sensitive enough to detect someone combing their hair at a distance of 5 meters or more (if your antenna is around 1/2 a meter long, and the humidity is low.)

Try building one, and then devising experiments to see and measure how little charge (voltage) the sensor can detect. You'll be surprised, I promise!

PARTS LIST:

  • 1 - Standard 9-volt battery
  • 1 - MPF-102 N-channel Field Effect Transistor (FET) Radio Shack #276-2062
  • 1 - any Red Light Emitting Diode (LED), eg Radio Shack #276-041
  • MISC:
    • Battery connector (#270-325)
    • Alligator Clip Leads (#278-1156)
    • solder, if desired
    • 1-meg resistor (not required)
    • plastic, fur, foil, comb, tape dispenser, plastic cup
[Drawing: FET and LED soldered to 9v connector]
(Tiny version built atop a 9v battery connector)


Further, William has some great experimental suggestions once you've built your very own, and includes a section on how the circuit works:
Bonus points to anyone who hooks it up to a computer to record field strength data. (email or message me if you are curious about how to do this.)


If you found that easy and/or interesting, try building this simple Marx Generator that only needs a few dollars-worth of parts.

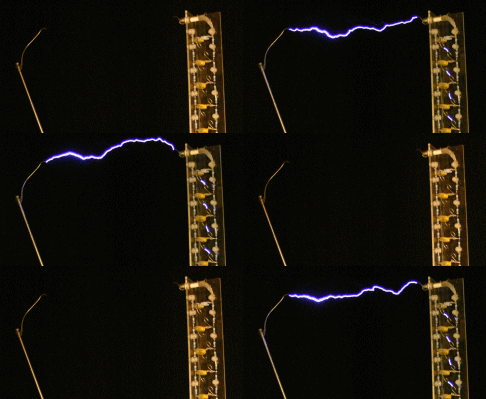
01514001.JPG (407904 bytes)

Animation4.gif (170069 bytes)


Here are some other simple activities to show electric effects from surface contact other than with friction using Scotch tape. Oh yes, and some plans to build your own Van de Graaff Generator.

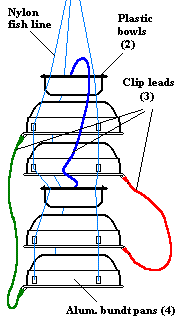
For something REALLY cool and esoteric, how about recreating an electrostatic generator from dripping water, a. la. Lord Kelvin, or a souped-up multi-stage version? All you need are some aluminum bundt pans, fishing line, and a couple aluminum buckets.


This is a short video of MIT's Professor Walter Lewin showing the "water droplet battery" in action.


Can anyone tell me how this works?


If you're looking for a good reference book with lots of interesting projects, try the Electrostatics Handbook, by Charles Green.

Finally, if you're interested in the history, check out the SparkMuseum to see some of the actual original scientific and demonstration equipment from when people were first figuring this stuff out.

Wednesday, December 26, 2007

The Arrow of Time

Most people take time for granted. And I don't just mean that it's hard to find enough time to do interesting things. I mean that the very notion that time flows in one direction is just a given in most peoples lives, and rarely noticed.

But to a physicist, contemplating time reveals an odd realization; none of the physical laws that we have discovered seem to restrict how or why time should flow forward vs. backwards. In other words, our physical laws are symmetric, and make no distinction between whether time is going forwards or backwards.

But watch this video. It is really easy to tell when time (and the video) is running forward vs. backwards. Why is that?


Follow this link for Sean's nice post on the Arrow of Time for some extra insights.

Monday, November 26, 2007

Crayon Physics

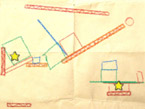
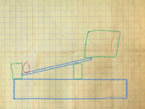
Check out Petri Purho's game called "Crayon Physics." You can download it from here for free.

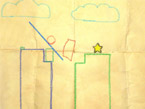
The premise is pretty simple. Draw objects on the screen with crayon, and watch them obey the laws of physics. The key is to figure out how to use what you know about physics to move a ball from one place to another. Some of the puzzles are easy, but others take some real creativity.

Screenshot of Crayon PhysicsScreenshot of Crayon PhysicsScreenshot of Crayon Physics

When my wife first saw the name and interface, she blew it off completely. But she happened to be watching when I was trying to solve one particularly tricky problem, and got sucked in within 30 seconds. Really cool. There's a new version coming out soon.

Make a Hi-Fi Speaker With a Paper Plate

Here's a fun little project that can lead to all sorts of interesting experiments and design ideas.
Jose Pino has managed to design a simple speaker that you can build from a couple of bucks worth of components that you likely already have lying around the house. The whole thing can be done in about an hour (not including time for the glue to dry), perfect for a lab or study hall period.

  homemade hi fidelity speaker.

You follow his step-by-step instructions online here, but the fun part would be to see if you couldn't really begin to up the fidelity by working on some acoustics and cavity resonance, perhaps trying some other materials.....


Start here, and see what you can imagine!

Sunday, October 21, 2007

Resonance

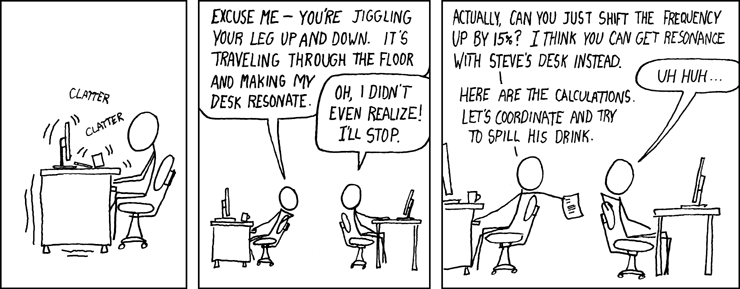
It's true. You can enjoy Physics anywhere, anytime. I've actually DONE this one!

Monday, October 1, 2007

Describing Motion: Kinematics

Now that you've started to build things that move, wouldn't it be cool if you could TALK about how they move?

I don't mean in the "Dude! My nifty robot just biffed into 50 pieces when it rolled off the table," sense. I mean in the NASA-type, "I'm going to tell you EXACTLY how it moved so you can build one too," sort of way. It might sometimes sound a little nerdy and stilted, but it is exactly this sort of precise language and careful description that enables us to land probes on other planets as well as design reliable and safe (and fast) cars, and so on. It might even help you on the occasional Physics test.

Most of this, all of you already know. You know how the "accelerator" speeds up a car and that the brake "decelerates" a car ("Deceleration" is the same as saying "acceleration in the opposite direction that you are moving.") You know that if you accelerate, you speed up (increase velocity) and if you decelerate, you slow down. Now we just need to get a little more precise about how we talk about it, how we use math to describe situations, and how we can use charts and graphs to really help understand what is going on.

There are two important aspects of accurately describing how things move: One is agreeing how we can all develop a common language to keep track of directions and measurements. The other is how to use the language and logic of mathematics to use what we have measured to make accurate predictions of how things will move in the future. Being able to speak about, and measure, and plot data surrounding motion is the first step.

So without worrying about the details, try fiddling with a couple if the simulations that I link to below. If you are even the slightest bit unsure or confused about how position, velocity, and acceleration are all interrelated and how each affects motion, or even how to use each of those terms to describe a situation, then these simulations are exactly what you need.

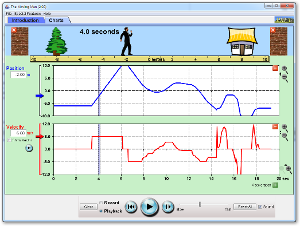
Move the Man. This is a neat little simulation where you can drag an icon of a person around and have it graph the position, velocity, and acceleration. Be sure to check the velocity and acceleration boxes at the bottom middle of the page under "Vectors" so you can see the


toycar
Using Hotwheels to learn about position, velocity and acceleration. This is a nice series of links that describe position, velocity, and acceleration. Be sure to click through all of the links on the left-hand side of the page to really understand the most typical situations, paying particular attention to the graphs of how each variable changes with respect to the others.
The key thing to understand is how acceleration can be either aligned in the same direction with motion, in effect reinforcing it and speeding it (increasing its velocity), or acceleration can be aligned against motion, slowing the motion and decreasing the velocity.

In Physics we use the mathematical convention of sign (positive or negative numbers) to keep track of whether objects are accelerating in the same, or opposite direction they are moving. If an object is accelerating in the same direction it is moving, both the acceleration and velocity should have the same sign. If they are opposed, they have opposite signs.

Observe how the graphs reflect all of these. Learn how to look at something moving and make position, velocity and accelerations graphs, and learn how to look at these graphs and be able to describe how something is moving.

Also, observe how the relative DIRECTION of the acceleration versus the velocity has a big influence on motion. You'll be hearing more about vectors very soon.


Finally, do post questions or suggestions by clicking on the comments link below, and we will answer as soon as possible. (and note that you can post anonymously!)